Do you need support?
Contact us

Regardless whether it is a first consultation or a concrete service request, with our contact form we put you in contact with the right person.
Introduction
This manual is part of the documentation for the PVGuard Supervisory Platform, the skytron monitoring and control system for photovoltaic power plants. PVGuard is a sophisticated software package, written in the Java™ programming language. The manual provides information concerning the installation and operation of PVGuard, including information concerning the installation of Java, and about certain other technical issues that may affect the correct operation of the program.
Overview to Installation
The installation of the PVGuard Supervisory Platform involves the following steps:
Preparation
- Check the computer specification against requirements
- Install Java®
- Obtain the user credentials from skytron
Installation
- Download and run the installation file from the PVGuard website
- Set the language
- Set up the connection details for your account (including proxy settings if necessary)
- Run the installed program
PVGuard product range
| Product | Description |
|---|---|
PVGuard Supervisory Platform |
PVGuard Supervisory Platform is our tool to help you with the remote monitoring and maintenance of your PV system. Specially designed for PV plants in the megawatt range, PVGuard® provides you with fast access to the operating data you need. |
PVGuard WebPortal |
The PVGuard WebPortal offers quick and convenient access to plant information that is typically of interest to plant owners and investors. Without the need for additional software and cumbersome program installations, and from (almost) any corner of the world, you can call up key information such as performance and yield data of your plant(s). |
PVGuard Mobile |
Through the PVGuard Mobile you get fast, global access to the most important plant data. The displays, which have been tailored to the needs of investors and plant operators, present performance and yield figures clearly on your mobile device. |
Before you start
Describes the necessary pre-requisities to be able to install PVGuard.
- Check your computer's configuration
- Ensure you have the correct software enviroment (Java) installed
- Obtain the login credentials from skytron
System Requirements
This section lists the minimum system requirements for running the PVGuard Supervisory Platform.
Operating system
PVGuard will run on operating systems that support Java. This includes both Microsoft Windows™ Windows and Apple OS X™.
At present, Version 8 of Java is recommended although the program will run on Version 7.
Processor
At least a dual-core processor (recommended 4 or more cores)
Memory
RAM: Minimum 2 GB, 8 GB recommended
Disk: Minimum 2 GB of free disk space
Video
Recommended resolution: 1920x1080 pixels
Installation of Java™
Java Runtime Envornment is a necessary pre-requisite for PVGuard. This section describes how to obtain and install Java for PVGuard.
Where can Java be obtained?
Java is produced by Oracle® and can be downloaded free of charge from the following website: http://www.java.com/en/download.
In general, you should follow the guidelines published by Oracle for installing Java on a PC. The notes in the following sections provide further guidance.
Which Java Version?
Currently Java Edition 7 (JRE 7) is recommended. Unless you need to develop Java programs yourself, you will only require the Java Runtime Environment (JRE).
32-Bit or 64-Bit version?
Java comes in 32-bit and 64-bit versions. You should follow the Oracle guidelines for establishing which version of Java you need.
For Windows: If your computer is running a 32-bit version of Windows, then you must install the 32-bit version of Java.
For OS X: The 64-bit version is to be used.
Guidance for this is available on the download website for Java (currently: http://docs.oracle.com/javase/7/docs/webnotes/install/index.html).
Updating Java
We recommend that the version of Java is kept up to date with updates as they are released by Oracle. Should any technical compatibility problems arise when installing a new version of Java, report this to the skytron service desk. Such problems are usually minor and will be resolved as a matter of priority by skytron.
Multiple versions of the Java environment
Experience has shown that having multiple versions of Java on a computer can give rise to problems, where only one (usually the latest) of the two versions is updated correctly. Therefore the use of only a single version of Java is preferred.
User credentials
Describes what user credentials are necessary to install and run PVGuard.
- Username and Password to be able to download the program from the PVGuard website
- URL, Username and Password to must be entered into the program to access your plant data
Installation of the PVGuard program
This section describes how you can obtain and install the PVGuard program.
Once Java has been installed, the PVGuard program may be downloaded and installed. Follow the steps described in the next sections.
Getting the PVGuard program
This section describes how to obtain PVGuard.
Download the installation file
You can download the installation file from the following webpage by entering your user details: http://www.pv-guard.com/login. You will need the website login name and password that you received from skytron. You will then be prompted to download or open an installation file having the extension '.jnlp'.
Running the installation
On downloading the installation file you will be usually prompted by your web browser as to whether you wish to save or run the file. You may save the downloaded file if you wish, but this is not essential. Run the file immediately to install PVGuard. A security message may be displayed before the installation process starts - simply accept this to allow the installation to proceed.
Setting the initial client configuration
Describes the initial settings for the client configuration during the installation.
If you are running PVGuard for the first time, the Client Configuration dialog will open during the installation process as shown below.
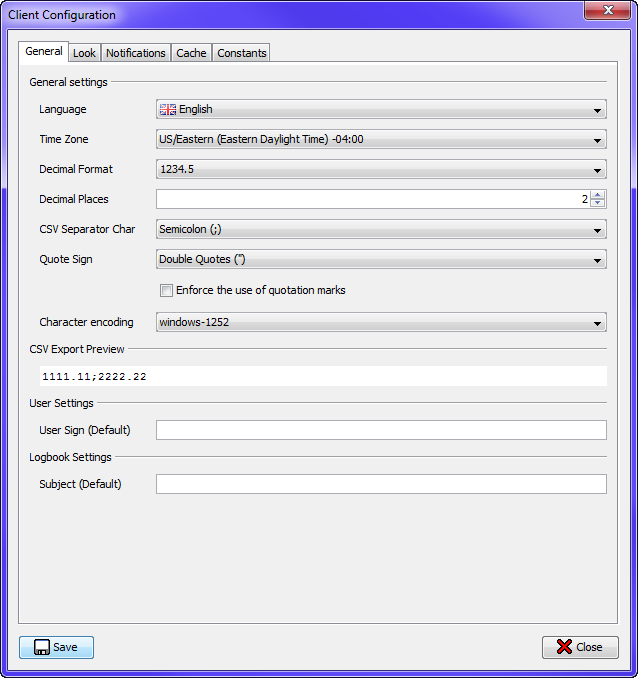
At this point all you need do is to select the desired language of the GUI in the Language drop-down list and click Save. The language selected will be set as the default; however, the language can be easily changed at any time later.
You may also find it useful to enable the menu feature that allows you to save the window arrangement. This is described in section Allow the window arrangement to be saved. Whilst not essential, many users find this function helpful.
Allow the window arrangement to be saved
By allowing the window arrangement to be saved and restored you can simplify the use of PVGuard.
If you run PVGuard regularly, you may find that there is a certain arrangement of the views is helpful to your work.. PVGuard makes it possible to save an arrangement, so that it is restored automatically next time you start the program.
However, first you must allow this menu function to appear. This is controlled by a setting in the Client Configuration dialog.
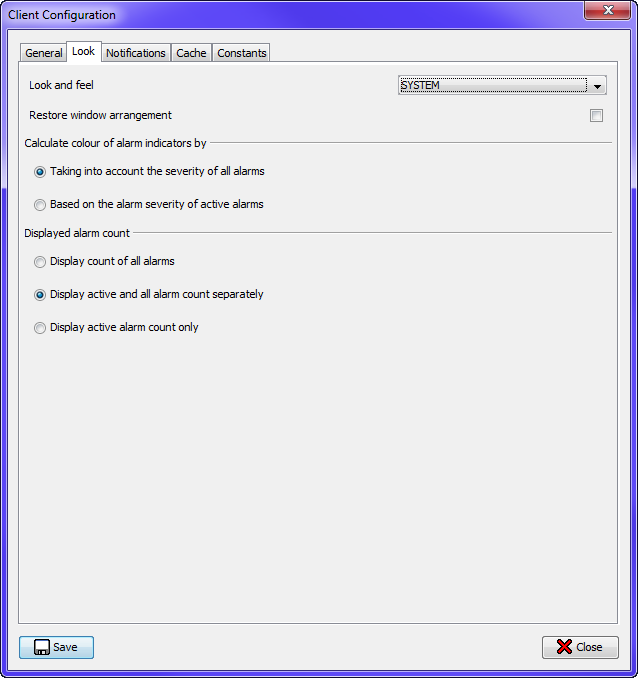
Open the dialog from the menu . Select the tab Look. Here, tick the box in the line Restore window arrangement, and click Save.
After this, a new menu command will become available . Arrange your preferred views in the most efficient arrangement in the program, and run this command. After this, the next time you start PVGuard, the saved arrangement of windows will be restored. You can change the arrangement at any time by running the command again.
Configuring the connection settings
Describes how to set up a connection with the PVGuard servers.
The Connect dialog
Before you can run PVGuard, you need to set up the connection details for your skytron account. This is information is entered through the Connect dialog.

Fill in the fields of this dialog according to the following table:
| Field | Entry |
|---|---|
| Name of Connection | Any name you wish |
| URL | The recommended URL is https://skygate.pv-guard.com/proxy using a secured connection. However, should you experience connection problems with this, a non-secured connection may be used through the URL http://skygate.pv-guard.com/proxy |
| Database | <Leave blank> |
| User | <Use the data supplied by skytron> |
| Password | <Use the data supplied by skytron> |
| Save Password | Activate this option box if you want avoid having to enter a password each time you use the program, and enter the password in the Password field. |
| Default Connection | Tick this box to have this connection re-established automatically after the program restarts. |
Save the connection details
We recommend you click the middle button, Save this Connection to save the connection settings as shown in the figure. The connection details for this connection will then be available in the connections list of the dialog after you restart the program.
Many organisations use a proxy server for Internet connections. If you know that your organisation uses such a server (or, for example, after find that you can't establish a direct connection), click on the button Proxy Settings... and enter the necessary details for the proxy server in the dialog as described in Configuring the Internet-Proxy Settings.
Finally, click the Connect button.
Configuring the Internet-Proxy Settings
Describes the configuration of the proxy settings for PVGuard.
The Proxy settings dialog allows you to configure the settingsskytron for the Internet access. If your organisation doesn't use a proxy server for Internet connections, you don't need to do anything in this respect; the default settings will be adequate.
What is a proxy?
Many organisations use a proxy server as a bridge between a company's internal networks and the Internet. Traffic to and from the Internet then passes through the proxy server. This provides enhanced security and other benefits. However, programs that need to access the Internet, such as a browser or PVGuard, may need to know about the proxy server otherwise they will not be able to make connections to the Internet.
By default PVGuard will attempt to access the Internet using a direct connection. If this doesn't function and you can't connect to the Internet you may need to adjust the proxy settings. In this case it is usually best to contact your network or IT systems administrator; they will be able to advise you about the settings to use.
The Proxy Settings Dialog
The Proxy Settings dialog is shown in Figure 4.
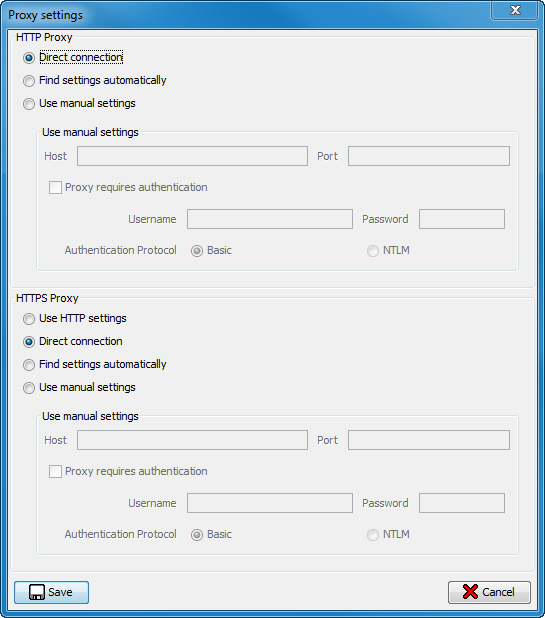
The dialog box is split into two similar halves: HTTP-Proxy and HTTPS-Proxy. However the use of HTTPS proxys is relatively rare, even when a URL with an https address is being contacted (such as https://skygate.pv-guard.com/proxy), and in this case we recommend you first consult your organisation's network administrator.
The settings are described in the following table.
| Field | Entry |
|---|---|
| Direct Connection | Select this option if you have a direct connection to the internet and do not use a proxy server. |
| Find settings automatically | In this option, the program will attempt to find the correct settings automatically, if this option is supported by the proxy server. |
| Use manual settings | Here you must manually enter the data to be used for the proxy. Host will usually be an IP address such as 192.164.200.200, and Port a number such as 8080. |
| Proxy requires authentication | If the proxy additionally requires a user name and password to allow traffic to the Internet, you should enter these here. |
| Authentication protocol | PVGuard supports both Basic and NTLM protocols for authentication with a proxy. Consult your network administrator concerning this. |
| Use HTTP settings (HTTPS section only) | Activate this option to have PVGuard use the same proxy settings for both secure (HTTPS) and non-secured (HTTP) connections. |
Running the program
Describes the first session of PVGuard.
Running the program for the first time
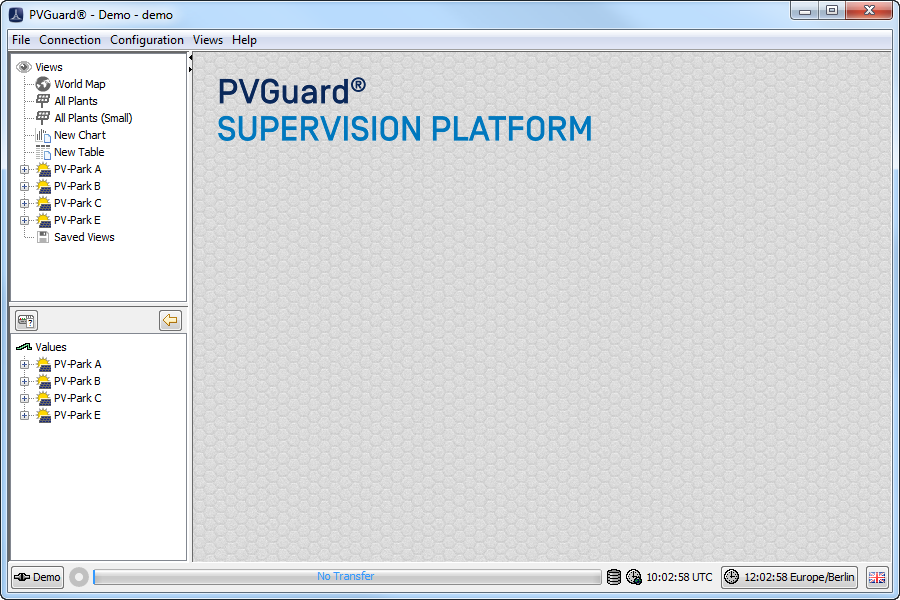
During the installation, an icon will have been saved on the computer desktop. Start the program using this icon. PVGuard will open using the default connection details that you entered. (If there is no default connection, the Connect dialog will pop up; enter the desired connection and click Connect.) If you hadn't saved a password, you will be prompted for one at this point. Then the program’s main window will open.
Operation of the program
Full details about running the program are given in the PVGuard User Manual.
Program updates
Updates to the program will by published by skytron from time to time. These will install automatically - no action is needed on your part. For major releases you will be informed about the updates contained in the new release.
Troubleshooting PVGuard
Provides some information about troubleshooting possible problems that might occur with an installation of the PVGuard Supervision Platform.
Usually the program will install and run without problems. However problems can sometimes occur so that the program does not appear to be running as it should. The following section provides you with guidance in the case any such problems occur.
Possible interactions between PVGuard and anti-virus systems
Describes how anti-virus systems can interfere with the correct operation of PVGuard.
- PVGuard runs very slowly
- Text on the user interface is not displayed correctly (e.g. appears in block capitals)
- Switching language in the middle of a session doesn’t work properly
- Data from the plants doesn’t appear
This might be due to one of the following causes:
-
Issue: PVGuard runs significantly slower.
Reason: The anti-virus system may be checking the cache file every time PVGuard writes to it (potentially many times per second). This checking has a major impact on performance.
Resolution: skytron recommends adding the file extension *.db to the exception list of the anti-virus software (the list of file types that aren't checked at runtime). For details on how to do this, you should refer to the documentation for the anti-virus system.
-
Issue: Text on the user interface doesn’t appear correctly. Changing the language in the middle of the session doesn’t work properly.
Reason: If your anti-virus system is configured to scan all web traffic, then this may interfere with the traffic between PVGuard and the skytron servers, since the anti-virus system must first buffer and scan all messages. This can lead to timeouts.
Resolution: The URL for PVGuard (e.g. http://skygate.pvguard.com) should be configured as a trusted address whose content doesn’t need to be checked. The details of this will depend on your anti-virus system. However, we recommend setting a trusted URL using a mask such as *.pv-guard.com/*.
Repairing PVGuard
Describes the function and operation of the PVGuard Repair Tool.
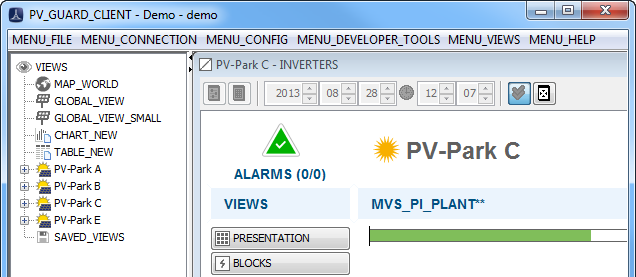
In rare cases, you might occur problems with PVGuard such as the display freezing or situations where the elements of the user interface appear in a ‘skeleton’ format as shown in Figure 1.
In these situations you should first run the Repair Tool function. The command for this can be found in the menu under . Amongst other things, the repair tool cleans the data stored on your PC in the program's “cache”. This cache stores, for example, the various texts that appear on the user display.
PVGuard Cleaning Tool
Describes the function and operation of the PVGuard Cleaning Tool.
If PVGuard fails to start at all, then it is possible that the application software itself has been damaged. In this case you should use the PVGuard Cleaning Tool. This can be found on the download page of the skytron website: http://www.skytron-energy.com/de/downloads/.
Download the program from the website and then extract the files either in the download directory or in a temporary folder. Two versions of the program are present: one for 32-bit systems and one for 64-bit systems. If you have a 32-bit version of Windows installed, just run the 32-bit version of the tool. Otherwise (64-bit), we recommend you first run the 32-bit cleaner and then the 64-bit version.
The tool will appear as shown below.
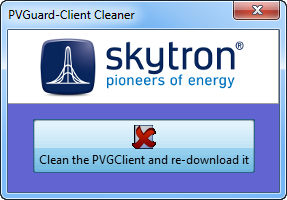
Click the cross to run the tool. It may take a few minutes to run. When it has finished, the message below will appear:
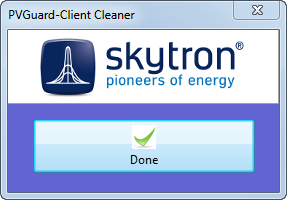
Next, login page of the PVGuard website will be opened, allowing you to download and reinstall a new version of PVGuard. In this case, proceed as described in Installation of the PVGuard program.
Reporting PVGuard errors
Describes how to report errors from within the PVGuard application.
In the event that PVGuard doesn’t function correctly, and you have checked for the error in the troubleshooting section of the manual, then you can report the error using the error reporting function built into the program. Using this function has the advantage that the error report to skytron is accompanied by the relevant information from the program that might be needed to resolve the problem.
To report an error choose the menu function . A wizard will start. Enter into the wizard an exact description of the symptoms, together with any other information you may have concerning the error.
Installation of the PVGuard program
This section describes how you can obtain and install the PVGuard program.
Once Java has been installed, the PVGuard program may be downloaded and installed. Follow the steps described in the next sections.
Getting the PVGuard program
This section describes how to obtain PVGuard.
Download the installation file
You can download the installation file from the following webpage by entering your user details: http://www.pv-guard.com/login. You will need the website login name and password that you received from skytron. You will then be prompted to download or open an installation file having the extension '.jnlp'.
Running the installation
On downloading the installation file you will be usually prompted by your web browser as to whether you wish to save or run the file. You may save the downloaded file if you wish, but this is not essential. Run the file immediately to install PVGuard. A security message may be displayed before the installation process starts - simply accept this to allow the installation to proceed.
Setting the initial client configuration
Describes the initial settings for the client configuration during the installation.
If you are running PVGuard for the first time, the Client Configuration dialog will open during the installation process as shown below.
At this point all you need do is to select the desired language of the GUI in the Language drop-down list and click Save. The language selected will be set as the default; however, the language can be easily changed at any time later.
You may also find it useful to enable the menu feature that allows you to save the window arrangement. This is described in section Allow the window arrangement to be saved. Whilst not essential, many users find this function helpful.
Allow the window arrangement to be saved
By allowing the window arrangement to be saved and restored you can simplify the use of PVGuard.
If you run PVGuard regularly, you may find that there is a certain arrangement of the views is helpful to your work.. PVGuard makes it possible to save an arrangement, so that it is restored automatically next time you start the program.
However, first you must allow this menu function to appear. This is controlled by a setting in the Client Configuration dialog.
Open the dialog from the menu . Select the tab Look. Here, tick the box in the line Restore window arrangement, and click Save.
After this, a new menu command will become available . Arrange your preferred views in the most efficient arrangement in the program, and run this command. After this, the next time you start PVGuard, the saved arrangement of windows will be restored. You can change the arrangement at any time by running the command again.
Configuring the connection settings
Describes how to set up a connection with the PVGuard servers.
The Connect dialog
Before you can run PVGuard, you need to set up the connection details for your skytron account. This is information is entered through the Connect dialog.
Fill in the fields of this dialog according to the following table:
| Field | Entry |
|---|---|
| Name of Connection | Any name you wish |
| URL | The recommended URL is https://skygate.pv-guard.com/proxy using a secured connection. However, should you experience connection problems with this, a non-secured connection may be used through the URL http://skygate.pv-guard.com/proxy |
| Database | <Leave blank> |
| User | <Use the data supplied by skytron> |
| Password | <Use the data supplied by skytron> |
| Save Password | Activate this option box if you want avoid having to enter a password each time you use the program, and enter the password in the Password field. |
| Default Connection | Tick this box to have this connection re-established automatically after the program restarts. |
Save the connection details
We recommend you click the middle button, Save this Connection to save the connection settings as shown in the figure. The connection details for this connection will then be available in the connections list of the dialog after you restart the program.
Many organisations use a proxy server for Internet connections. If you know that your organisation uses such a server (or, for example, after find that you can't establish a direct connection), click on the button Proxy Settings... and enter the necessary details for the proxy server in the dialog as described in Configuring the Internet-Proxy Settings.
Finally, click the Connect button.
Configuring the Internet-Proxy Settings
Describes the configuration of the proxy settings for PVGuard.
The Proxy settings dialog allows you to configure the settingsskytron for the Internet access. If your organisation doesn't use a proxy server for Internet connections, you don't need to do anything in this respect; the default settings will be adequate.
What is a proxy?
Many organisations use a proxy server as a bridge between a company's internal networks and the Internet. Traffic to and from the Internet then passes through the proxy server. This provides enhanced security and other benefits. However, programs that need to access the Internet, such as a browser or PVGuard, may need to know about the proxy server otherwise they will not be able to make connections to the Internet.
By default PVGuard will attempt to access the Internet using a direct connection. If this doesn't function and you can't connect to the Internet you may need to adjust the proxy settings. In this case it is usually best to contact your network or IT systems administrator; they will be able to advise you about the settings to use.
The Proxy Settings Dialog
The Proxy Settings dialog is shown in Figure 4.
The dialog box is split into two similar halves: HTTP-Proxy and HTTPS-Proxy. However the use of HTTPS proxys is relatively rare, even when a URL with an https address is being contacted (such as https://skygate.pv-guard.com/proxy), and in this case we recommend you first consult your organisation's network administrator.
The settings are described in the following table.
| Field | Entry |
|---|---|
| Direct Connection | Select this option if you have a direct connection to the internet and do not use a proxy server. |
| Find settings automatically | In this option, the program will attempt to find the correct settings automatically, if this option is supported by the proxy server. |
| Use manual settings | Here you must manually enter the data to be used for the proxy. Host will usually be an IP address such as 192.164.200.200, and Port a number such as 8080. |
| Proxy requires authentication | If the proxy additionally requires a user name and password to allow traffic to the Internet, you should enter these here. |
| Authentication protocol | PVGuard supports both Basic and NTLM protocols for authentication with a proxy. Consult your network administrator concerning this. |
| Use HTTP settings (HTTPS section only) | Activate this option to have PVGuard use the same proxy settings for both secure (HTTPS) and non-secured (HTTP) connections. |
Running the program
Describes the first session of PVGuard.
Running the program for the first time
During the installation, an icon will have been saved on the computer desktop. Start the program using this icon. PVGuard will open using the default connection details that you entered. (If there is no default connection, the Connect dialog will pop up; enter the desired connection and click Connect.) If you hadn't saved a password, you will be prompted for one at this point. Then the program’s main window will open.
Operation of the program
Full details about running the program are given in the PVGuard User Manual.
Program updates
Updates to the program will by published by skytron from time to time. These will install automatically - no action is needed on your part. For major releases you will be informed about the updates contained in the new release.